
If you are new to Photoshop (or GIMP) and freaking out because it looks daunting and WHAT DOES ANYTHING DO, I have written a sort of introductory post here.
Okay, so you've made it this far. Here's a bowl of virtual ice cream. Here are some of my favorite (and most used) Photoshop tools.
 |
| Fonts from Dafont.com and misprintedtype.com |
1. Blending Modes
The blending mode changes the look of the current layer in relation to the layers below it. For example...........
Instead of this...
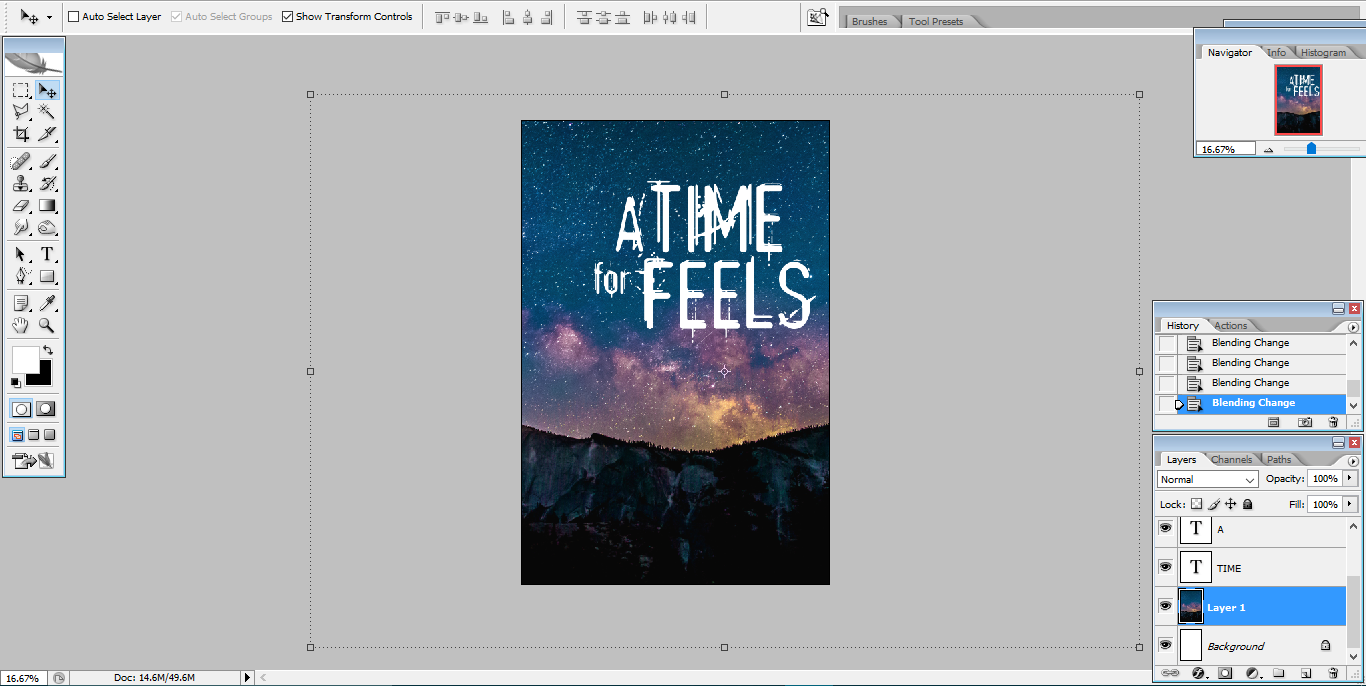 |
| Click any of the photos to enlarge them. |
You can change the blending mode so it looks like this:

Or this...

You don't just have to use this with text layers. Try it with pictures, shapes, and with the brush tool! Try using it to add more color to a sunset! One thing to make sure of, however, is that your text is ALWAYS readable.
2. Surface Blur Tool
This is a really neat effect to make a picture look a bit like a digital painting.


3. Pressing "Control" "Shift" "ALT" "E"
This is a tool I use ALL THE TIME. When you press "control" "shift" "ALT" and "e" at the same time, it will flatten the image into a new layer. So, basically, you get a flat layer of what you are creating, plus you keep the layers of the image below it!
4. Magic Eraser Tool
The Magic Eraser takes away all of one color in a layer. This is very handy for taking out a white background.

5. The Tool That Lets You Change the Shape of Text.
Yeah, I don't really know what it's actually called. For this demonstration, I will be using a cover I made for Aimee Meester's Pariah. (P.S. Aimee is awesome and you should TOTALLY check out her blog!) (Also P.S. I made this cover because I wanted to. I haven't read her book, but I did look at her Pinterest board.)
Step 1 - Make sure the text layer is rasterized. You can do this by right-clicking on the text layer, and selecting the "Rasterize Layer" option.

Step 2 - Make sure are on the transform tool. Then, click on your text on one of the little corner dot things.
Step 3 - Click on the icon I highlighted for you.

More dots should appear on the outline. Now you can twist your text around to fit a shape or do whatever you want!
 |
| This is just an example of what you can do. I promise I didn't twist the text around this much on the actual cover. |
Here's my finished cover for Pariah. :)
 |
| I know, it's not the greatest...but I tried. ;) |
--------------------
Have you ever used Photoshop? What are some of your favorite tools?
This is so cool! I love the Pariah cover, and the "A Time to Die," font you used in your first example ;D
ReplyDeleteI, sadly, do not have Photoshop and always forget about Gimp. I do have Lightroom for photography purposes, but it doesn't do cool text stuff. I usually end up using Picmonkey
Jeneca @ <a href="http://www.jeniquablog.wordpress.com/>Jeniqua Writes</a>
Thank you so much, Jeneca!
DeleteI use GIMP sometimes and from what I can tell, it is almost exactly like Photoshop.
Haha wow I've never even tried to use photoshop before! XD Normally I use Canva for my blog post graphics and stuff... but photoshop sure looks cool! :)
ReplyDeleteI like Canva too, I just like the versatility of Photoshop. You should try it (or GIMP) sometime!
DeleteWhat is that font called? I do like Photoshop, and use it a lot, but more often to touch up photos but some days I do get creative. Your cover you made there looks rather cool.
ReplyDeleteThe font I used at the font I used for the blog graphic (and the first few examples) is called Astonished from fontsquirrel.com. The one I used for the cover of Pariah can be found here: http://www.dafont.com/advent-psychosis.font
DeleteDid that help?
This comment has been removed by the author.
ReplyDeleteDude that you for this *flailing* I don't have photoshop and GIMP is still really daunting but this is super helpful thank youuuuu
ReplyDeleteAlso that Pariah cover is amazing.
Awww. :) You're welcome! Let me know if you have any questions about it.
DeleteThank you so much, Anna!
Thank you so much for this post, Alea! It's SO cool how you can make a cover like that (your Pariah cover looks AH-MAZING, by the way)!
ReplyDeleteAwww you're welcome. Thank you so much for your sweet comment!
Delete